If you are keto, one of the best things to be aware of are the snacks that you can have that fit within your dietary restrictions.
A lot of snacks that are keto friendly are things that you will have to make yourself. Because of this, you will want to be aware of the recipes that make food which you can enjoy whenever you want.
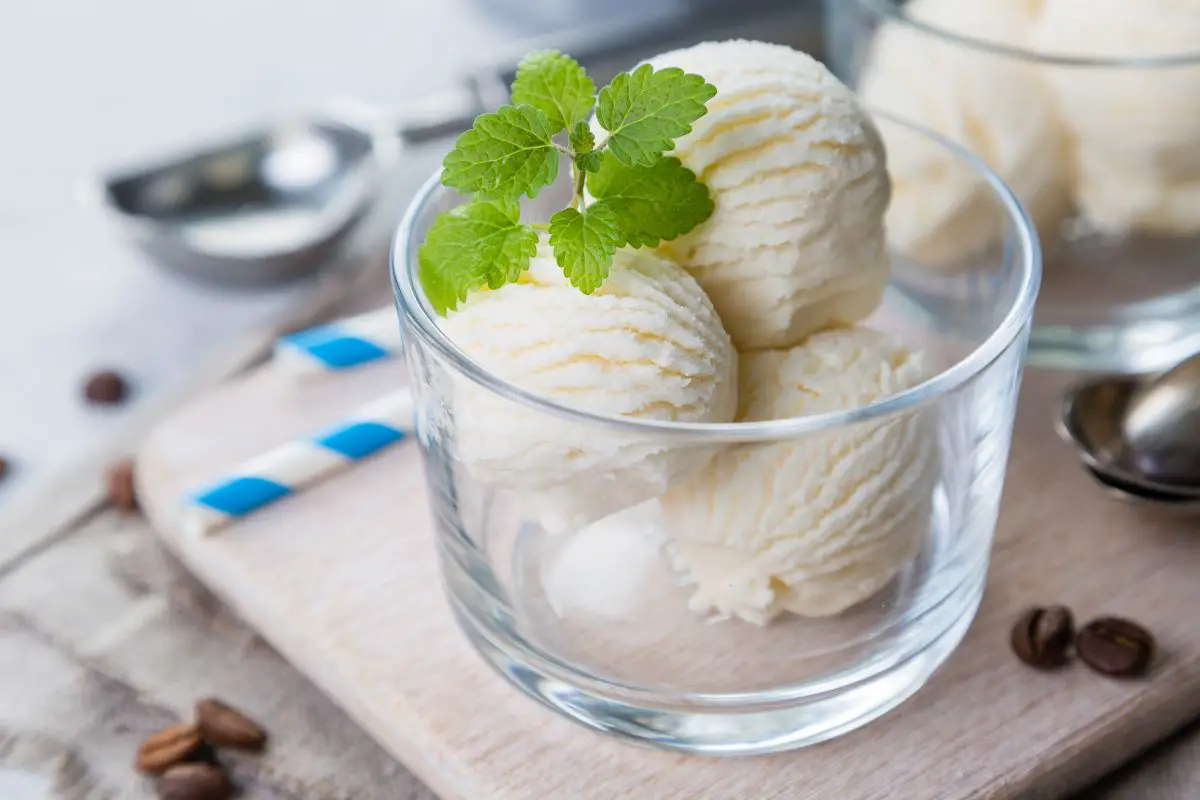
One particular snack that is rare to enjoy when you are keto is ice cream, and this is because of how most ice cream you will find in a store is not made in a way that makes it something keto people can enjoy.
However, that does not mean that it is impossible to enjoy ice cream when you are keto. In fact the opposite is true, there are plenty of different ice cream recipes that you can make which make delicious ice cream which is also keto.
There are plenty of different recipes out there, however, we have got our favorite one here so you can have the best ice cream recipe at your disposal.
It is also worth noting that even though this recipe is for vanilla ice cream, that you can adapt the flavoring used to make it whatever you flavor you want, just beware that whatever you use as flavoring will need to be keto for the final ice cream to still be keto.
We love this recipe because the ice cream is sweet and creamy, as well as being completely sugar free.
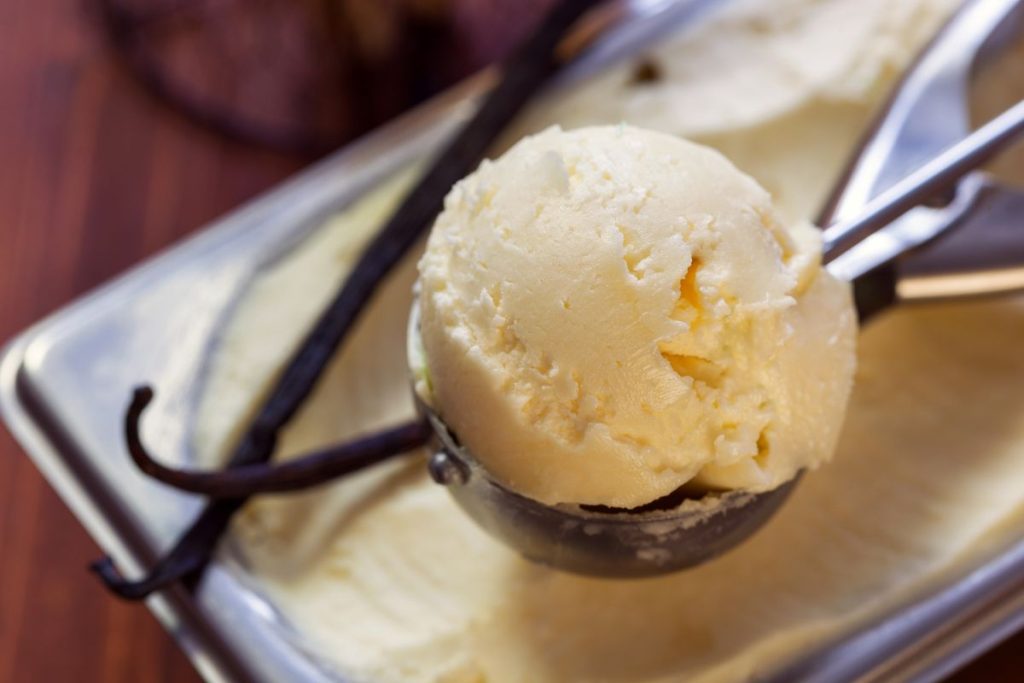
We made this recipe using the amazing Ninja Creami, and while this ice cream can be made using another machine, you will get the best results if you make it using a Ninja Creami, and this recipe is written specifically with the Ninja Creami in mind, so you might have to make some adaptions if you are not using one!
Putting together this keto ice cream recipe is not easy since various types of milk and sweeteners and flavorings all had to be tested to get the best results possible.
If you are keto you know how much you have to experiment, and work with ingredients you otherwise would not consider to get the best results, and the same is true with this recipe.
We finally got the best results when making this recipe with allulose and heavy cream.
If you are unsure of any of the ingredients we mention, do not worry as we will go through all of them in the ingredients section.
This is such an amazing ice cream recipe because you will genuinely struggle to recognize that this ice cream is both keto and sugar free.
You still get the great sweet vanilla flavor, as well as a creamy texture and smooth feel even though this is usually missing from most dietary ice creams. There is also no bad or strange aftertaste that you often find with diet food products.
Also, as we mentioned earlier, while vanilla might not be everyone’s favorite flavor of ice cream, it is the foundational flavor for most other flavors of ice cream, so adding mix ins make it a perfect base for experimenting.
The best thing about this ice cream is that you will only get 1.6 net carbs, and 177 calories per serving making it a great diet option.
It is also worth noting that we strongly recommend using allulose as your sweetener in this recipe instead of alternative sweeteners like erythritol sweeteners as this will just result in a powdery and gritty texture that you will want to avoid.
But, if you want to learn how to make this amazing keto ice cream, keep reading!
Ingredients
When it comes to keto recipes, it is useful to understand what ingredients are being used and how they will impact the final result.
This can help with your keto journey as it can inform you which ingredients are best to work with, and how they will affect the recipe you use them in.
The first main ingredient we use in this keto ice cream recipe, which we mentioned earlier is heavy cream.
We recommend working with heavy cream because it aids in helping you get the desired creamy and sweet flavor. The ice cream simply does not work if you do not use it.
A lot of people will try to avoid using heavy cream since it is notorious for not being the healthiest ingredient.
This is why we choose to balance out the heavy cream with an unsweetened almond milk, this combination helps you get both the desired texture and taste, while not being too unhealthy. The next ingredient is the aforementioned unsweetened almond milk. We love using this with the heavy cream because it has a great flavor, but it is also low in carbs and does not have that many calories either.
While unsweetened almond milk is the best milk we recommend for this recipe, there are other low carb milk options you can try as well.
For example, another great milk which we got good results with was unsweetened macadamia milk as well, however, this is not as easy to source which is why we generally recommend almond instead.
Now one of the most important ingredients in this recipe, and the one we recommend that you do not substitute for anything else is allulose sweetener.
When you are using heavy cream, using allulose is the only option if you want to get the correct level of sweetness while also getting a good consistency and texture.
Getting a good texture when making homemade ice cream can be a struggle which is why we recommend always going with what the recipe recommends since it is likely that other options have already been tested.
This is also why we so strongly recommend against using something like an erythritol based sweetener either, the most common option being Swerve.
If you use a sweetener like this you are very likely to end up with a powdery texture. When it comes to flavoring, you cannot have vanilla ice cream without using vanilla. The type of vanilla you use is up to you, just make sure it is keto.
The type we ended up using is vanilla extract, however, there are plenty of options to try, so test which one has your favorite flavor.
Then you also need to use guar gum as well for this recipe. This is an important ingredient since it is used as a thickening agent, and it is what gets you the creamy texture you want from an ice cream or a sorbet.
If you do not use it, you will not get the desired texture. You could also try using xantham gum, however, when we tried this we did not get a texture that was as creamy as we wanted it to be.
We occasionally add xantham gum alongside guar gum, instead of using it as a substitute.
This is because if you use xantham gum and guar gum you will improve the texture of your ice cream, while also getting less ice crystals too!
So, now you know all of the ingredients you need to make this delicious ice cream, let’s go through exactly how to make it to ensure that you get the best results possible!
How To Make It
At the end of this guide we are going to give you a shortened version of this recipe method so you have all the information in a more condensed form.
However, since this is quite an involved recipe where it is easy to make mistakes, we have made a lengthened version of the instructions that go into deeper detail so you know exactly what you need to do.
Because of this, we recommend that you go through this section before you attempt the recipe to ensure that you get the best results possible.
The first step you want to do is combining all of the wet ingredients into your blender. The wet ingredients are the almond milk, the vanilla, and the heavy cream.
You only want to mix them for a little bit as you just want to combine them, if you mix it too long you will end up whipping the cream which is not what you want to do.
After this you want to combine all of your dry ingredients, being the guar gum, the xantham gum, and the allulose, and blend all of these in with the wet ingredients.
You want to make sure that the gums have been evenly distributed amongst the allulose, if they are not spread evenly, then they will clump once they are mixed in with the wet ingredients and then they will not work as effectively.
After you have done this you want to pour this mixture into your Ninja Creami pint container, then you want to place this into the freezer.
You then want to make sure this is left to freeze for at least 24 hours. This recipe needs preparation, so do not try and make it in a rush.
Once the mix has been freezing for 24 hours, you want to take the lid off of the pint container, then place this into the Ninja Creami outer bowl.
Then you need to install the paddle of the Ninja Creami into the lid of the outer bowl. Then you lock it into place in the way which is described in the manual for your Ninja Creami.
A lot of this stage of the recipe can be understood easier if you are familiar with how the Ninja Creami works, so we recommend reading the instructions closely.
Once you have set up the Ninja Creami correctly, you want to choose the Lite Ice Cream mode, and then the machine will spin for a few minutes. Once you notice it has stopped spinning, you can check the container and see if it is the right consistency.
If you notice that the texture of the mix is powdery instead of creamy and smooth, then you are going to need to respin the mixture.
If you are going to need to respin, then you want the outer bowl lid to be back on, and then lock this into the Ninja Creami and then you will need to push the respin button.
Once this respin is finished, you want to take it out and check the consistency and hopefully it should be smooth and creamy, otherwise you will need to respin again.
Once you have gotten the desired results, you want to serve the ice cream immediately and enjoy it!
What To Try When Working With The Ninja Creami
Now you know how to make this delicious ice cream, we have some general advice that will ensure that you get the best results possible when working with the Ninja Creami for this recipe, but also for other recipes which you try in the future.
The main piece of advice we can give when working with the Ninja Creami is that if you are using a larger amount of heavy cream like in this recipe, you need to avoid using erythritol at all costs as it is not an effective sweetener for this tool.
This is because it will keep the ice cream powdery which is of course not the texture which anyone wants. In most cases, if you are working with the Ninja Creami you are going to want to use an alternative sweetener like allulose.
There are other sweeteners you could test out, but if you want to avoid a failed batch and wasted ingredients, then we recommend using allulose.
Another expert piece of advice for working with a Ninja Creami, we want you to make sure that when you are freezing your mixture, ensure that your pint is on a level surface in your freezer.
This saves any mess or unnecessary clean up either.
Related to this, but you also do not want your ice cream to be filled anywhere past the fill line as this can lead to unnecessary clean up as well.
You will have also noticed that in the instructions for the Ninja Creami it will recommend that you freeze your mix for at least 24 hours.
Once you have reached 24 hours, you want to make sure that your mix has completely hardened, if this has not happened, you might need to freeze it for even longer.
Also, depending on the recipe that you are using, and the temperature of your freezer, there is a chance that you are going to need to respin your mix a few times.
A common example of this is when the mix has been frozen at a lower temperature, then it will need to respin more times.
Sometimes you might need to respin up to 10 times, so do not give up if you have only respinned a couple of times.
However, if this is something you keep running into, then you might want to lower the temperature of your freezer if this is an option!
One thing that a lot of people forget to consider is that if they are adding any mix ins to the ice cream, do not do this when you are freezing the mix. You only want to add them when the mix has already been spun.
You can do this by simply pouring them in and using the mix in preset button to incorporate them. Make sure to use a mix in setting because if you use a different one, your mix ins will be shredded too fine to be enjoyable.
Now you know how to get the most out of working with your Ninja Creami, let’s give you some advice on how to store ice cream made with the Ninja Creami!
Storing Ice Cream
While you can store ice cream that has been made using the Ninja Creami, the best results you will get are when you enjoy and eat your Ninja Creami ice cream as soon as it is finished.
However, since this specific recipe is made using heavy cream which has a higher fat content, this means that it is going to store better than alternate choices that do not have any heavy cream content.
So, if you have leftovers, or if you are making a batch with storing as the intention, you want to put it in an airtight container and keep it in your freezer.
When you are serving frozen Ninja Creami ice cream, you will likely need to let it thaw a little before serving, however, you are not going to need to go as far as respinning it to get good results!
Method
The only equipment you are going to need for this recipe is a Ninja Creami or a Ninja Creami Deluxe, as well as a blender for mixing the ingredients thoroughly first.
For ingredients, you are going to need 1 cup of unsweetened vanilla or plain almond milk, as well as ¾ of a cup of heavy cream. You also want 1 and a half teaspoons of vanilla extract.
For the dry ingredients you will need a third cup and 1 tablespoon of allulose, with pure allulose sweetener being the best option. On top of this, a quarter scant teaspoon of both guar gum and xantham gum.
The first step is preparing the base. To do this you want to combine all of your wet ingredients into a blender and mix them well until combined, but do not over blend to start whipping the cream.
Then you will need to combine your dry ingredients making sure the gum is distributed in the allulose. Then blend the dry ingredients into the wet ingredients.
Once everything is mixed and distributed evenly you will have your prepared base.
Then you pour this blended mixture out of the blender and into your Ninja Creami pint container and then leave this level in the freezer for at least 24 hours until the mixture has hardened.
Then, once you are sure that the ingredients have been frozen properly, you can take the lid off your pint and put this in your Ninja Creami outer bowl.
After this, install the Ninja Creami paddle into the pint lid and put this on the outer bowl and then lock it into place. After this, select the lite ice cream setting and this will spin for a few minutes.
If the mixture has stopped spinning and you have the texture of ice cream, it is ready to serve, however, if it is powdery then you will need to respin it.
To do this all you have to do is put the pint back into the Ninja Creami and select the respin option. You will need to keep doing this until the consistency is smooth.
Just some notes to ensure you get the best results! This recipe was made for the original Ninja Creami, but if you are using the deluxe option, you can make a bigger portion using a 1.5x conversion on the amounts.
Also, we cannot stress enough how important it is to use allulose for this recipe to get the best results possible.
If you use some other types of sweeteners with as much heavy cream as is in this recipe, the texture will stay gritty and stay powdery, so do not use it.
It is also worth pointing out that allulose is classified as a rare sugar and not a sugar alcohol.
In spite of this, this recipe uses allulose like it is a sugar alcohol, and this is because the glucose levels are not impacted and it will usually be subtracted from the net carb counts.
Frequently Asked Questions
Yes, and there is a chance that you will need to freeze it for longer!
Yes, just store your ice cream in an airtight container and you can refreeze it. You will not need to respin it once you want to eat it, but it will need to thaw for a couple of minutes.
Summary
Hopefully this recipe has given you all the information and guidance you need on how to make the best ice cream possible using your Ninja Creami.
This gets some great results if you closely follow our instructions, so make sure that you pay attention to the ingredients too!
As we have mentioned a couple of times throughout the recipe, you will be able to use this recipe as a base for other keto ice cream ideas, so try out whatever you want using this recipe as a base!


io
Tuesday 11th of July 2023
heavy cream is not healthy? who says that? That's the stupidest most ignorant thing around. It's like saying meat is bad for you.
Raymond
Friday 26th of May 2023
Can regular milk be used instead of almond milk (personally can't stand the stuff and I know to many people with nut allergies)